
When installing on a Windows 7 or Windows Server 2008 machine we must first download and install .NET Framework 4.0. This can be downloaded here.
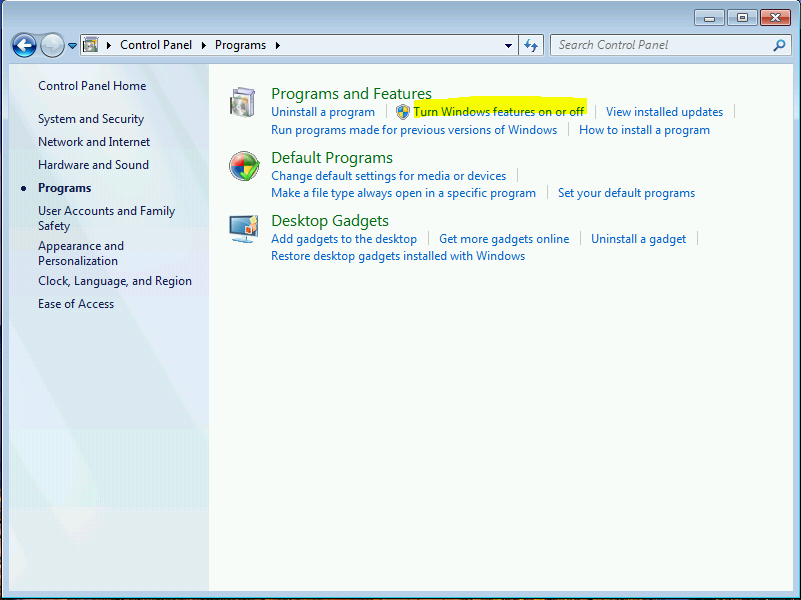
In Windows 7, after you have downloaded and installed .NET Framework 4.0 we need to navigate to the Windows Features. To do so click Start and then Control Panel. Once in the control panel select Programs and then Turn Windows Features on or off.
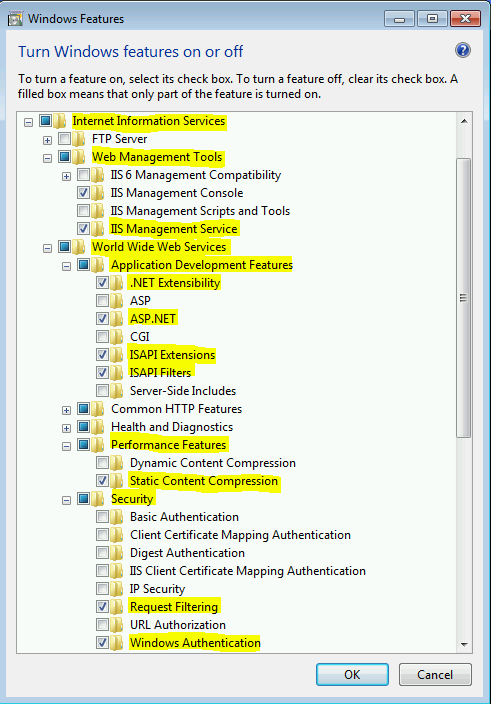
The following are the paths to the desired Windows Features. The Bold feature in each path is the one that should be turned ON.
✓Internet Information Services
✓Internet Information Services>Web Management Tools
✓Internet Information Services>Web Management Tools>IIS Management Service
✓Internet Information Services>World Wide Web Services
✓Internet Information Services>World Wide Web Services>Application Development Features
✓Internet Information Services>World Wide Web Services>Application Development Features>.NET Extensibility
✓Internet Information Services>World Wide Web Services>Application Development Features>ASP .NET
✓Internet Information Services>World Wide Web Services>Application Development Features>ISAPI Extensions
✓Internet Information Services>World Wide Web Services>Application Development Features>ISAPI Filters
✓Internet Information Services>World Wide Web Services>Performance Features
✓Internet Information Services>World Wide Web Services>Performance Features>Static Content Compression
✓Internet Information Services>World Wide Web Services>Security
✓Internet Information Services>World Wide Web Services>Security>Request Filtering
✓Internet Information Services>World Wide Web Services>Security>Windows Authentication
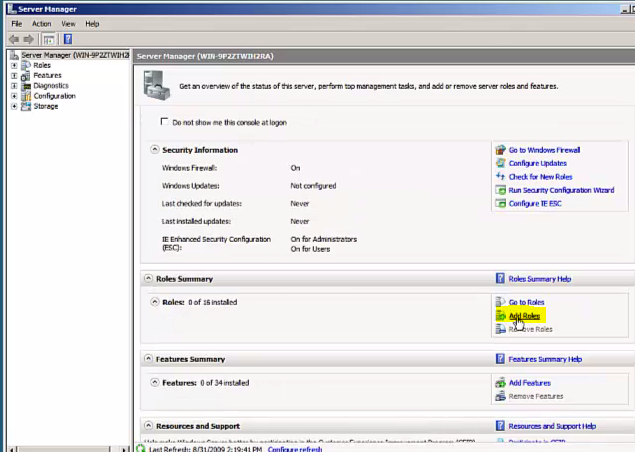
When Installing on Windows Server 2008 we will use the Server Manager which can be accessed through the Start Menu. Once in the Server Manager click Add Roles.
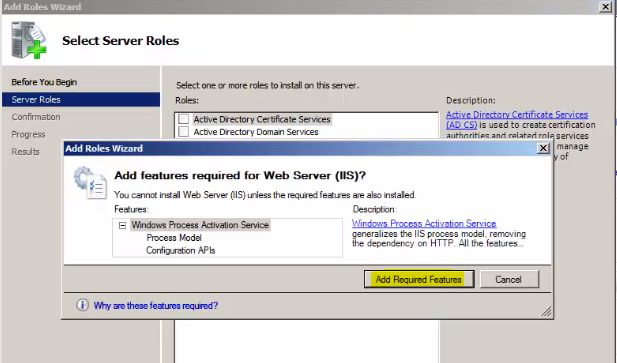
This will bring up a wizard, click Next to reach the Server Roles page. On this page select Web Server (IIS), and in the pop-up window select Add Required Features.
After this is done click Next until you reach the Role Services page. Here you will check ASP .NET under Web Server>Application Development. This will invoke another pop-up, click Add Required Role Services to continue.
Once this is completed click Next and we will reach the Confirmation page. On this page click Install to finish the wizard.
During installation you will need to provide a 30 day evaluation code. You may choose to open up your email and copy the evaluation code now.
Once your system is configured correctly and you have accessed your evaluation code, you are ready to begin installation.
Next Step: Server Install
