The Sample Host Application |

|

|
|
The Sample Host Application |
|
|
The Sample Host Application |
|
|
|
The Sample Host Application |
|
|
The sample application was written in RPG on an iSeries, a brief explanation follows to make the process of recording, mapping and generating the web service easier to understand.
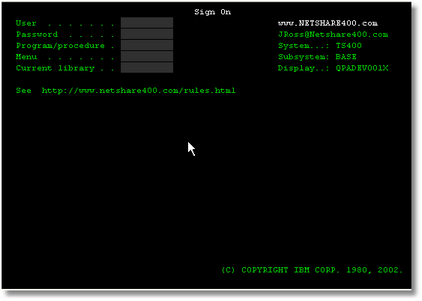
The first screen to be processed is the iSeries sign on screen, a valid user name and password must be supplied to continue.Once this has been entered, a screen appears with the users details , pressing enter allows the user to continue.
Screen 1
A Sign on screen requires a user name and password to be entered,if you have set up the Simulation script and defined this as your host you can log on by entering 'flynetsim' as the user name and password.
Screen 2
Once a successful sign on has been achieved the users details are displayed, enter is pressed to continue to the next screen.

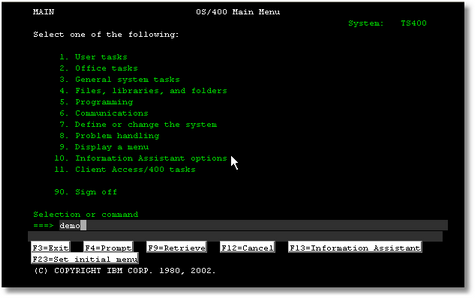
Screen 3
The next screen in the sample application is the main OS/400 menu, this allows command entry, the Flynet Application is accessed by typing 'demo' on the command line.
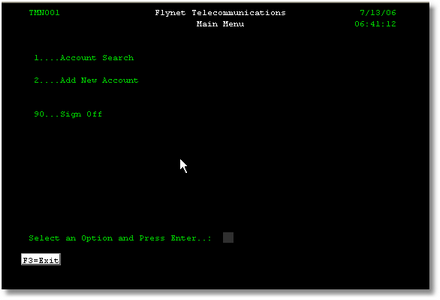
Screen 4
This is the Flynet Telecommunications application main menu, this has three options depending on the sample recording either option 1. for Account Search or 2. to Add New Account will be taken, option 1. will taken for all but one of the sample web services, when the log off method is invoked in the Web Service Logoff method, the third option 90. to sign off will be utilised, although this will be transparent to the user as this occurs as part of the recorded navigation process.
Screen 5.
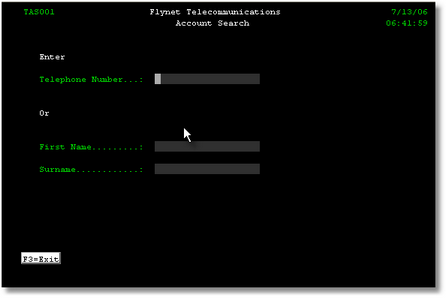
The Account Search screen allows you to enter either a Telephone Number or Name to retrieve the Account Details (screen 6) , it also allows for part of the surname to be entered, a screen will then be displayed with all of the Accounts matching the partial surname entry.
Screen 6.
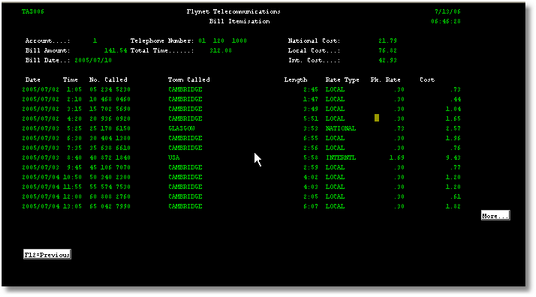
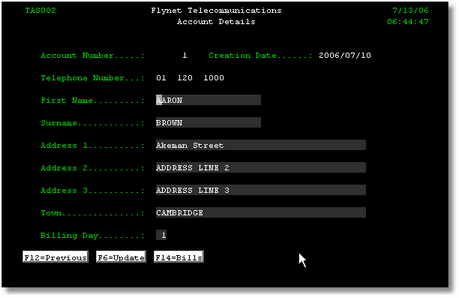
Once the Account Details screen has been displayed , the Billing Information can be displayed by pressing F14.
A full Bill Itemisation screen will be displayed for any of the rows displayed above upon entry of an 'S' to select the required record.

The Bill Itemisation screen.