Setting up a Solution and Project in Viewer Studio |

|

|
|
Setting up a Solution and Project in Viewer Studio |
|
|
Setting up a Solution and Project in Viewer Studio |
|
|
|
Setting up a Solution and Project in Viewer Studio |
|
|
Provided Help:
Online Videos:
Tutorial Steps (Cookbook Style from first part of Import Video):
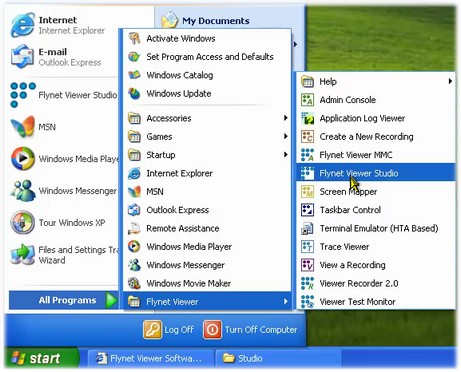
1.While there many ways to create shortcuts on the desktop or in the start folder's recent items, this shows using the All programs folder to open Flynet Viewer Studio from the installer's link setup in the Flynet Viewer folder:
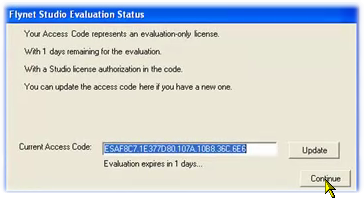
2.This will open Studio--if you have an evaluation access code active, click continue and write a note to send the purchase order by the end of today:
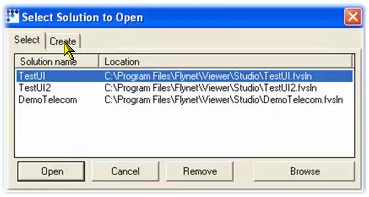
3.Since you probably want to create a new Solution, do not click on any of the Sample solutions created during setup and click on the Create Tab:
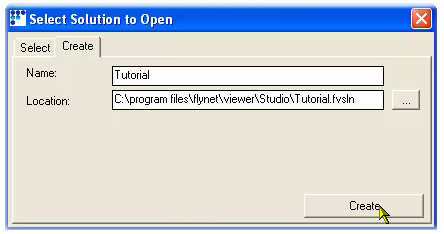
4.Enter the name of your solution--in the sample, this is Tutorial, but give your solution a name that matches the expected project name, then click on Create:
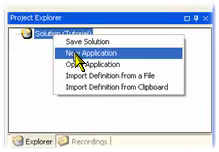
5.This opens Studio with an empty solution to which you want to add a new Application project. Right-clicked on the Solution in the Project Explorer and will select New Application:
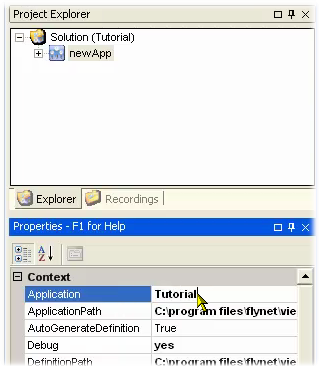
6.A new application project is always named NewApp which you don't want to keep so go to the Properties panel and change the Application property to a good project name (here it is named Tutorial):
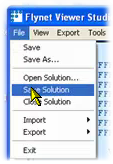
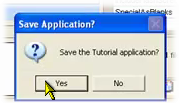
7.Now that you have setup with your new solution and application project, save them both by clicking on the File / Save Solution and will click yes to the prompt to save the application too:
8.Shown was how to create a new project named Tutorial contained in a new solution, also named Tutorial, which is ready for importing the first recording.
Next Step: Importing your First Recording