Generating the Web Service |

|

|
|
Generating the Web Service |
|
|
Generating the Web Service |
|
|
|
Generating the Web Service |
|
|
Once all the screens and fields have been defined correctly you are now ready to generate the Web Service.
The Full task based Web Service generator is started by right-clicking on your task project.
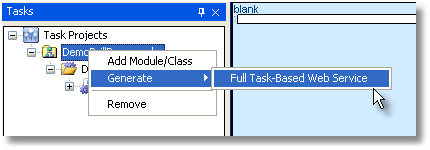
Once this option has been selected a Wizard appears to guide you through the steps necessary to create your Web Service.
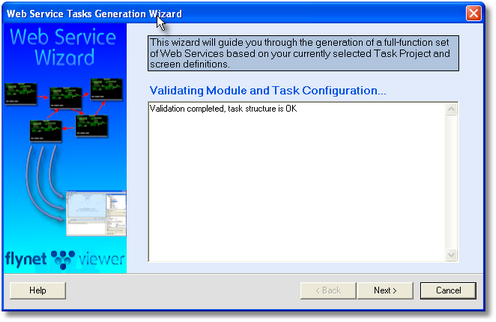
A full help is available by pressing F1 when the wizard appears but for the purposes of this tutorial there are some points to be taken into consideration.
First of all as shown above the first step is to validate the module and task structure, in the example shown this is ok.
Next the navigation will be validated , if at any stage you have forgotten to define fields or screens correctly the wizard will inform you of any errors, you may have to go back and check the steps as described previously in this tutorial.
You will be asked to provide a HostName, this will be the host name you have defined in the admin. console and used in the recordings, if you are not using this as your host and are using a simulation script, please refer to the Using Alternative hosts section.
Just a special note on the next part of the generation process, you will be asked to provide a project path, this determines the path for the code generation, when developing you may experience problems if you have generated a Web Service previously to the same folder.See Tips and Good Working Practises for more information.

Finally the Web Service will be generated and you will be provided with a link to your newly created Web Service, the code produced (either in VS 2003 or 2005) , is well structured and easy to follow, it's even commented for you.
A URL will be provided for you to test out the Web Service.