
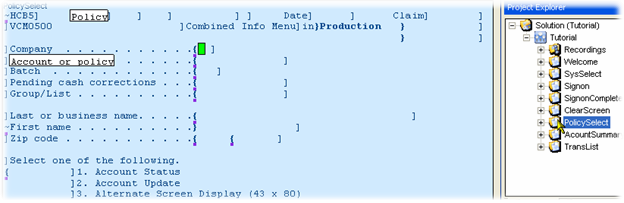
The Application screen is the most common type--using the wizard for this kind of screen builds on what was learned in the Signon Screen example.
Provided Help:
Import Wizard Help: Viewer Studio Screen Mapping Wizard
Tutorial for Application Screen Mapping Wizard:
1.Start the Screen Mapping Wizard as before, but for a standard application screen with no multiple row areas:
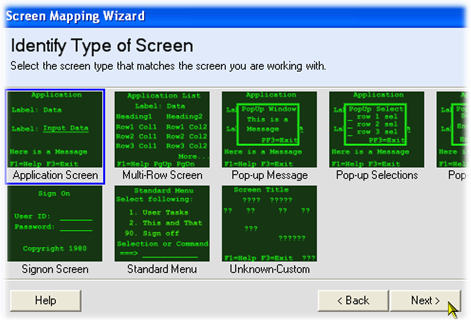
2.Select the default screen type (Application):
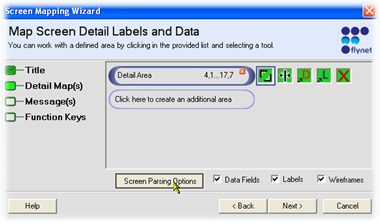
3.Additional Wizard panels are introduced Application type in addition to the Detail field map(s): Title, Messages and Function Keys with the Title first. While not used for Web services, the Title area is given a Label type with a Title CSS class for UI generation. Even if you are only planning web services, having the title defined is useful should you decide in the future to go with a UI (and defining it is very quick). With the left mouse button, the area is dragged and defined: 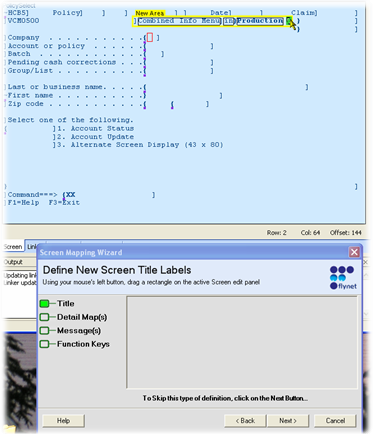
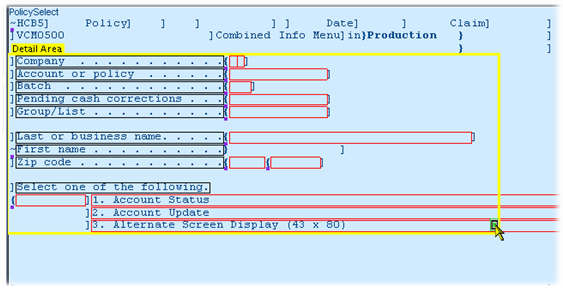
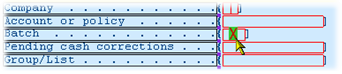
4.After clicking Next, the Detail area is to be mapped. Initially, the mouse pointer is "loaded" with the area defining tool, ready for you to define the first block of fields to be captured for the default screen map. You can capture from more than one area, but first you will drag with the left mouse button to define the area. Here is the wizard panel at the start:

Here is the mapping, press and hold mouse left button in one corner, drag to the opposite corner and release:
Note that labels are in BLACK and Fields are in Red...some of the above labels are incorrectly identified as fields...
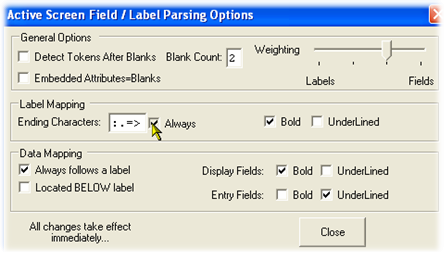
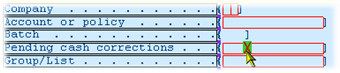
5.Adjust the Parsing Options...these are retained between uses of the Wizard so sometimes they need to be tuned for a particular type of screen in your application. First, click on the Parsing Options button:
Then adjust the settings. Here, the requirement that every label end in a special character affected the 1. Account Status and other labels in that part of the screen, so it was unchecked...
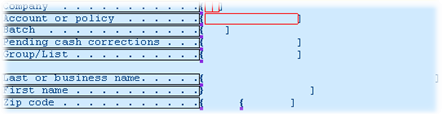
Which will immediately affect the capture coding--visible in the mapping area:
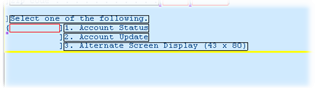
Note the 1., 2., 3. options are now black and no longer considered fields. This is simply an example of parsing option adjustment--at any time you can play with the options to obtain better results on a global screen basis.
6.While the Parsing Options can help with bulk field / label captures, the individual mouse tools provide individual control. You can load the mouse the the Label tool so that each token clicked will be forced to a Label. Same goes for fields using the Field tool. In this example, we do not want as many fields as have been identified, so will delete a number of fields using the Delete tool:
Clicking one of the tools sets the mode of the mouse to that tool. This is the Delete Tool. Clicking on a token removes it:
And the next:
Until all fields not wanted have been clicked:
7.At this time, another block of labels and fields can be defined with an additional detail area by clicking on the:

But for this example we will click Next in the Wizard panel to move to the Field Naming and Properties panel:
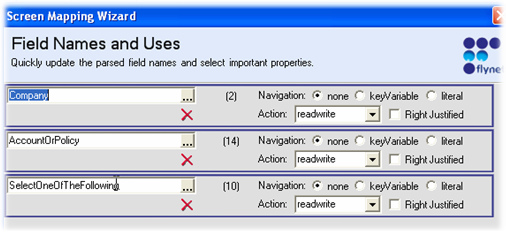
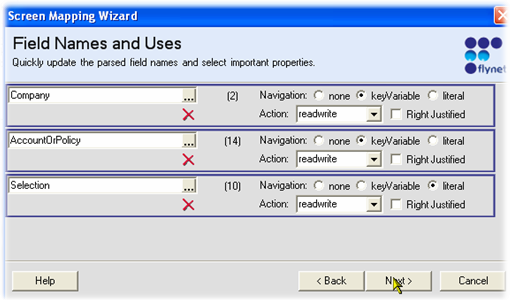
The above needs the Company and AccountOrPolicy set as keyVariables (they fit that navigation type) and the name for the selection is not clear, and it should be set as a Literal navigation type. After these changes:
8.That completes the definition of the default FieldMap fields and the Labels for the screen. Next is the definition of the Messages area. By uniquely defining where Messages reside, the wizard names each output field found starting with "Message" which is used at code generation and runtime as a simple way to identify program messages from the host:
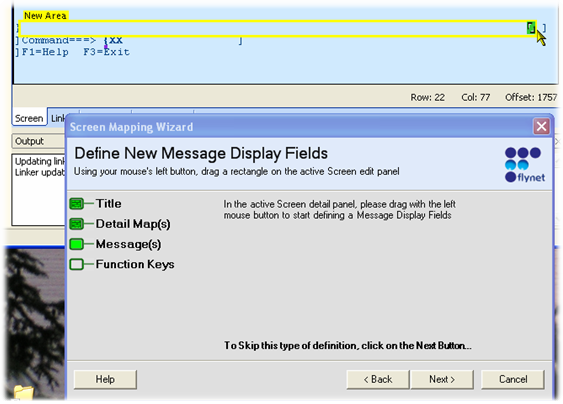
You may need to run the application a bit or use the Heatmap tool to identify where the messages appear, since it may not always be obvious. You can add Message fields later using simple field mapping; just remember to start the name with "Message".
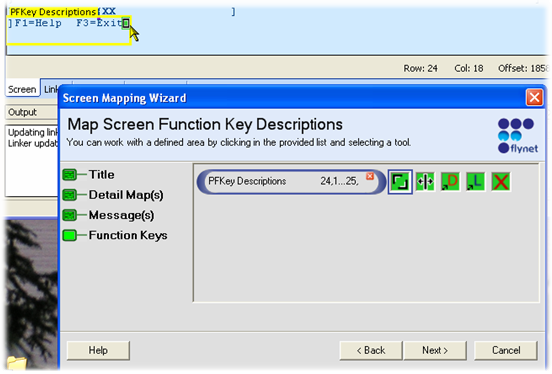
9.After messages comes the Function Key definitions. By identifying those Function keys you would like to capture, the Screen Definitions Actions property will be populated with Button definitions that are also tied to requests to the Viewer framework to run that action (which will be associated with the corresponding Function Key):
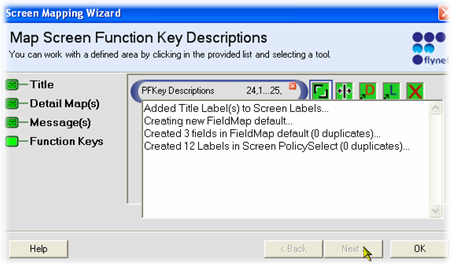
10.After clicking Next, the wizard generates the Labels and Fields:
11.Next, if Function keys were defined, you will be prompted if you would like to hook real keyboard keys to the buttons--you are recommended to click on Yes, but if you never expect to enable users to keep using the same keys, you can click No and it will slightly reduce a few properties if a UI is later generated for this screen:

12.That completes the tutorial for Application Screen Mapping.
Next step: Screen Mapping Wizard for Multirow Screens
