
Mapping a Multirow screen builds on the Simple Screen case:
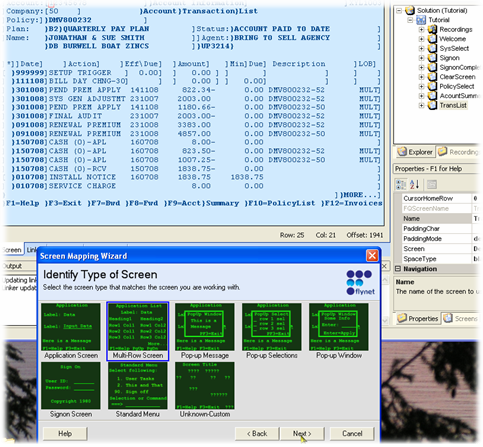
1. These steps are for a more complicated screen showing more Wizard panels and demonstrating its full power. As before, the screen is right-clicked, and Modeling / Screen Mapping Wizard is selected. In the example, a screen with multiple-occurring rows has been selected so the appropriate screen personality is selected:
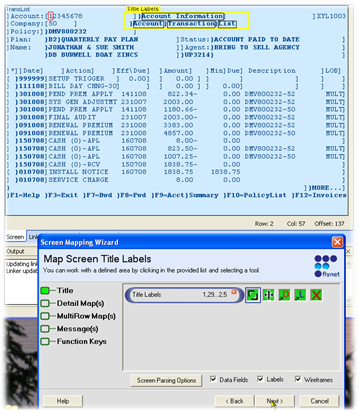
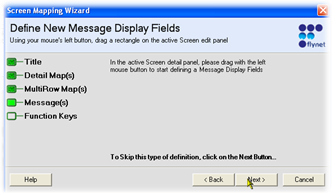
2. A multi-row screen wizard will all of the phases of the Application screen and add a Wizard panel for defining multirows. First, the Title:
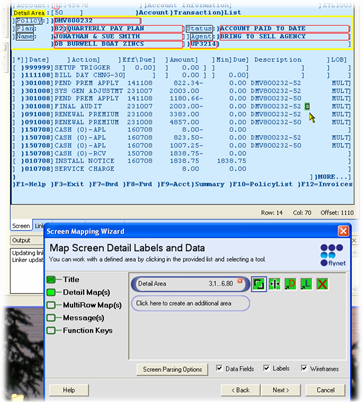
3.Since multi-row screens frequently have a detail area (default map), the Detail panel comes next:
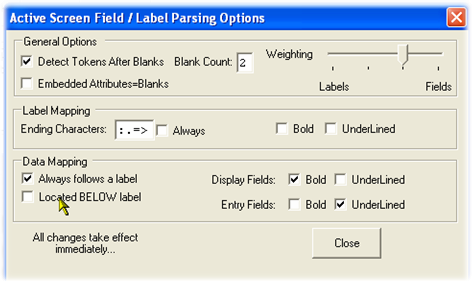
4. If the labels and data fields are not parsed correctly, you can adjust the parsing options by clicking on the Screen Parsing Options button. In the example, labels had been set as being above the data fields from a prior run of the wizard--they are set correctly to provide better field naming logic:
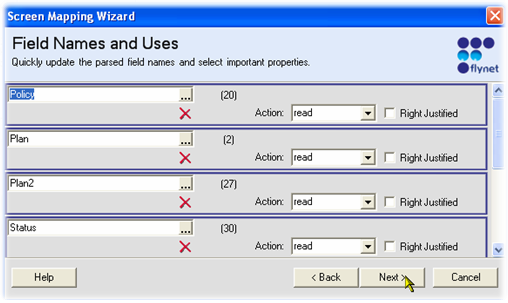
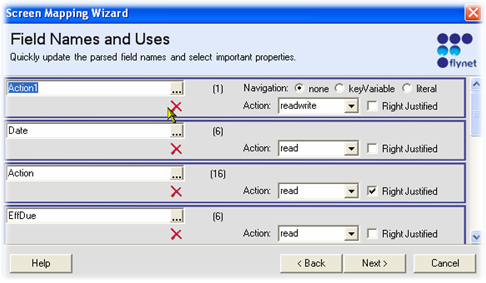
5.After clicking Next, set the field names as you like, including any changes. Note that typically you do not need to set the NavigationUse for most screen data. While earlier examples show setting it, most fields are data fields which have no navigation use..click Next to work on the MultiRow field map:
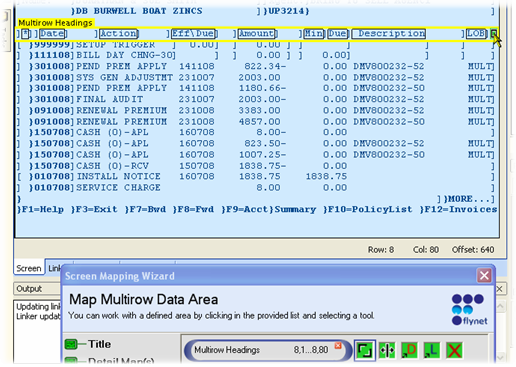
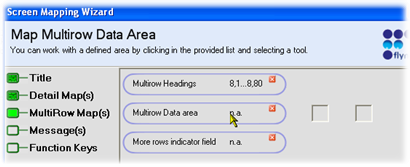
6.Multirow field maps have three definitions set on the Wizard Panel: Headers, Row data and MoreIndicator field. Each of these is defined by clicking on one of the center buttons in the wizard panel. First, the row headers are automatically selected. Select the row headers:
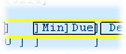
7. Note that the Min Due header has been identified as two headers--use the Splitter Joiner tool to join the two labels, selecting then sets the cursor so that if placed in a "gap" it will join elements; if clicked in the middle of an element it will split it:
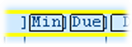
If you look closely, the Min Due has two label boxes instead of one
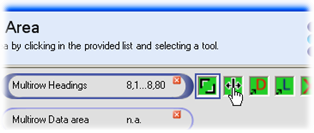
So the Splitter / Joiner Mouse tool is clicked...

And the gap is clicked on to JOIN the two tokens into one
 The Header label is now one element instead of two...
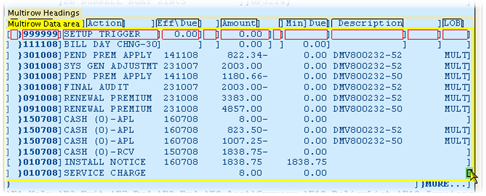
8.Now that the headers are setup correctly, click on the Multirow Data Area to define where the rows are:
9.Next, swipe the the whole area of the rows, first to last, leftmost column to rightmost:
10.Next, click on the "More Rows Indicator" and select the location on the screen where some text appears indicating the status of the row set:
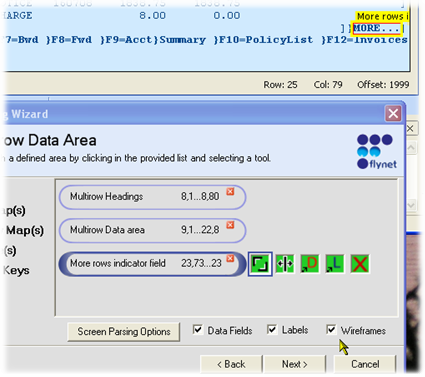
11. Next the column field names are displayed: change names accordingly as well as delete any extras that are not data but just gaps in the column list:
12.Click Next--You will next define where Messages and Function Keys display on the screen. The next steps are the same as the end of the Tutorial for Application Screen Mapping Wizard
13.One difference with this run-through is that after defining the Messages and Function keys, and answering the Message Box about the Function Key mapping, a new prompt appears. This prompt asks about Navigation Fields when none have been defined. This is just to provide a reminder that if there are any navigation fields (key fields or literals) on the screen, you should remember to define them or if not, simply click Yes:

14.On answering that prompt, the fields, labels and Function key actions are generated and the Wizard is done.
