
Provided Help:
Administration: Adding/Deleting Hosts
Administration: Host Definition Properties
Online Videos:
Tutorial Steps (Cookbook Style from Video):
NOTE: The first steps, which include Adding a new Host can more easily be accomplished with the New Host Wizard found on the server at http://localhost/fvterm/config/admin.html
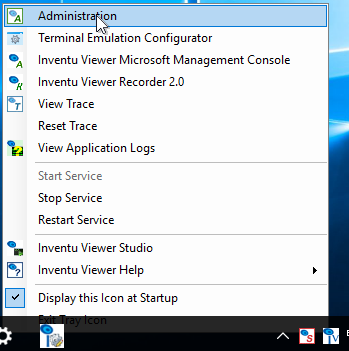
1.Use the Viewer Administration applet to access your host settings: click on the Blue Inventu Viewer+ icon in the taskbar tray and click on Administration
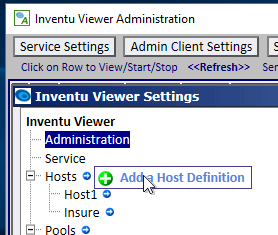
2.To add a new host definition, click on the arrow to the right of the toplevel Hosts node; Clicking the Add a Host Definition option creates a new host and displays the properties for it:
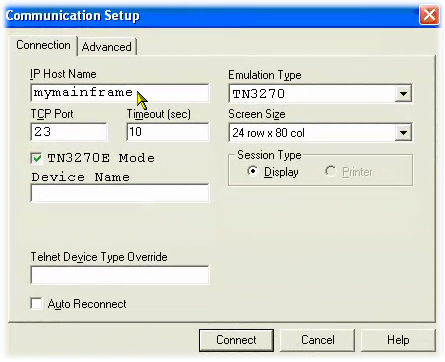
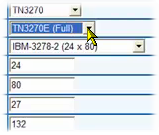
3.Before defining your host, you will need to know a few details, and the best source is an existing user's terminal emulator. There are a lot of these around, with a wide variety of user interfaces, but the idea is to find a connection definition that includes the target host address, terminal type and any other details you can find. Here is an example screenshot of a sample configuration, that shows a host address of mymainframe and a terminal type of TN3270, with TN3270E mode checked. These are kinds of details you can use in defining your Viewer Host:
4.The first property to change for a new host definition is the DNS name or IP address of the host you are connecting to...In this example, a DNS name of mymainframe is used, indicating a local network name, but this could also be a fully qualified name with the full domain, as well as a numeric ip address. Enter your host's DNS name:
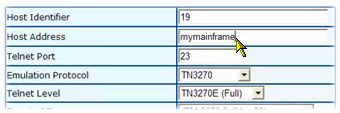
5.This examples defines a TN3270, and leaves the TN3270E options as they are, as well as the terminal type...but these are just the kind of properties that you want to match with the settings in a user's terminal emulator:
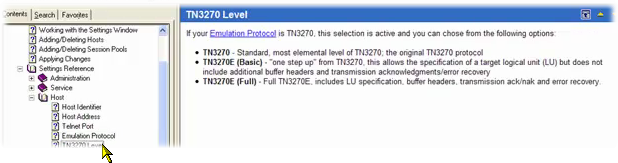
6.If you need some help on what a particular setting is for, the F1, or Help key is available and here is an example of the Help displayed on pressing F1:
7.Another important property is the Connect Text Row and Column. You might not know what to enter here until after you have connected to your host and been able to identify a specific, constant text string that appears on the first screen.
For the sample host, it has been identified that on row 12, column 15, the text signon appears...by entering it here, each connection made in a web service or ASP.NET UI will complete up to 5 seconds faster, as by providing this tip to the emulation server, it is able to check, and if the text is there, complete the connection, instead of waiting for 5 seconds of silence, which is what happens without this property being set:

With the property set correctly, connections will be 5 seconds faster; remember to return to your host definition(s) and update this if you don't have this information available when first defining the host.
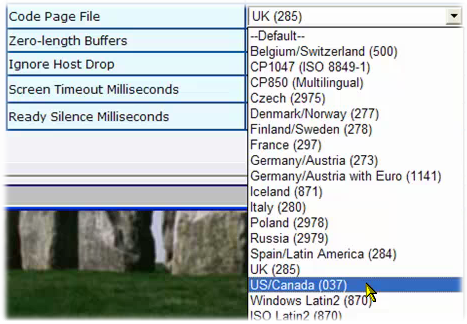
8.The next key setting is for the Code Page used for translation of IBM host text to the ASCII and Unicode used in Viewer applications. As the sample host is in the US, it is changed to the US/Canada code page, but this is another setting that is best found in a user's terminal emulator connection configuration:
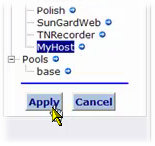
9.In this sequence, the author forgot to name the host at the beginning, a host name should be something better than 19...we would recommend a name that reflects the common name used for the application. The sample names it MyHost:

10.To complete the configuration, click on the Apply Button:
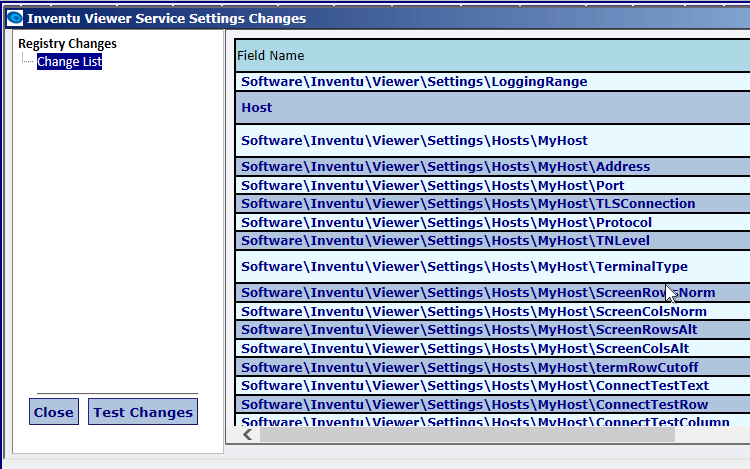
11.The configuration interface shows the registry settings that have been changed. all of these settings can be changed later by simply opening the Administration window, clicking on Service Settings and clicking on the host you would like to change:
Next step: How to Make a Recording of an Application
