
Provided Help:
Online Videos:
Tutorial Steps (Cookbook Style from second part of Import Video):
1.From the prior step, you now have a new project contained in a new solution and are ready to import your first recording. For the first recording, skip to Step 4.
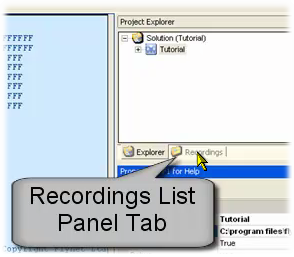
For future or additional recording, to start the import, click on the Recordings Tab, found where the default configuration has it nested with the Project Explorer in the upper right panel of the IDE:
2.If you remember from the Recording Workflows video/tutorial step, the Recordings list filter was set to Policy, and the recording created there was named PolicyDetail. Since Viewer Studio and the Recordings manager both share the same configuration setting for the recordings filter, you now only see those recordings that begin with the text Policy--the filter can be changed at any time to accommodate multiple applications on the same PC:
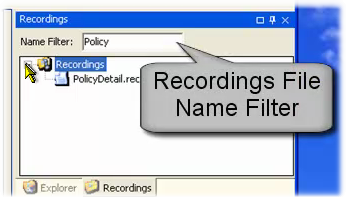
If you need to change the filter, feel free to do so in order to match the name(s) of your recording(s).
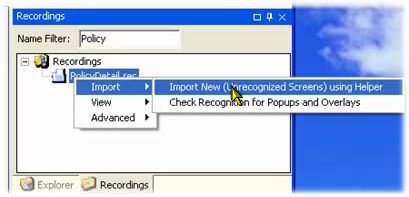
3.To run the import helper, right-click on your recording and select Import / Import New using Helper:
4.This launches the import helper, which is a small window that you can move so that you can see the Screen panel in the Studio IDE:
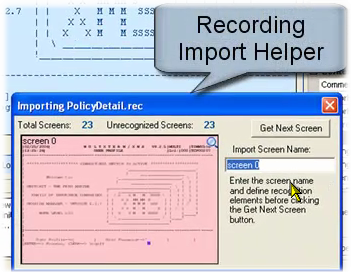
5.The Import helper scans the recording and finds any unrecognized screens. With this, your first recording, all of the screens will be unrecognized since the application is empty of Screen definitions.
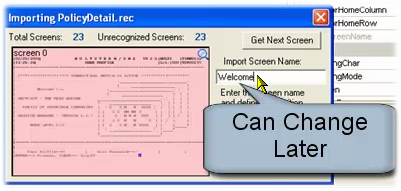
Each time the import helper finds a screen that isn't defined in the active application, it will place the screen image in the Screen panel as well as in the import helper and set focus to the screen name.
With each new screen, first use the keyboard to enter what you think is a good name for the screen. This name can be changed in the project explorer, so don't worry about perfect naming initially, especially since as you record more screens you will probably want to adjust some names.
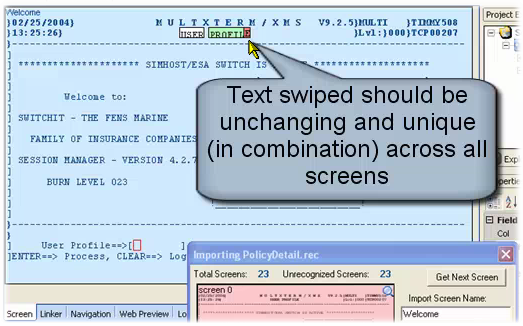
6.After keying the name, use the mouse to swipe, with the left button, a few sections of text on the screen. This forms the basis for recognition of the screen, and you should only swipe text you know to be constant and unique in combination to this screen. As with the name, what you do here can be changed later, so don't worry about getting it perfect, but do your best in this phase so that the import helper is able to properly find the unrecognized screens as it gets deeper into the recording:
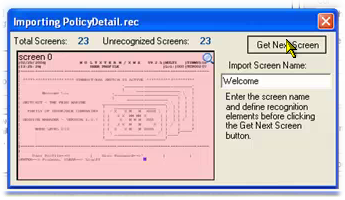
7.Once you have named a screen and set its recognition text, click the Get Next Screen button to find the next screen in the recording. If a screen is in the recorded work flow two or more times, by recognizing it properly, you won't see it in the helper more than once:
8.Continue along, key-stroking the name, swiping recognition text and clicking on the Get Next Screen button for each newly unrecognized screen in your recording...
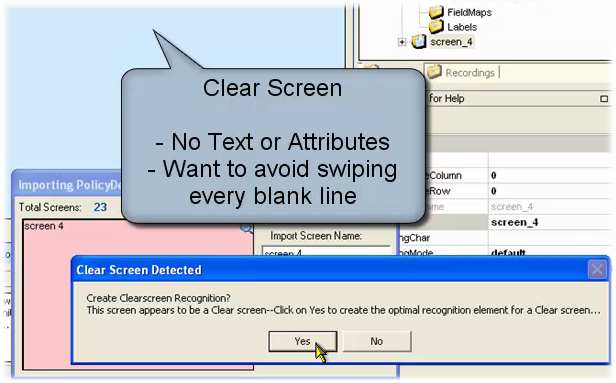
If there are any "CLEAR" screens, Viewer has special recognition for clear screens, which have no text at all on them. The reason that there is special recognition settings for clear screens is to avoid the need for you to swipe random and numerous areas of the screen as "should be blank" since there are plenty of screens that have been programmed with just one line of text...somewhere..on the screen. The special clear screen recognition avoids the need for multiple blank text recognition and is not only reliable but at runtime it is very efficient.
If you have a clear screen and see the "Clear Screen Detected", Click YES, give it a good name and continue:
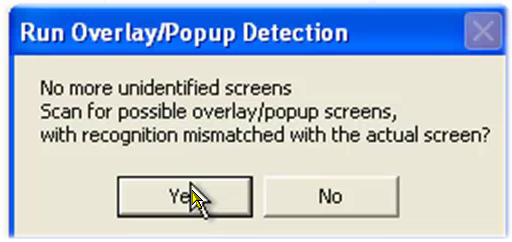
9.Once you have imported all the new screens, the import helper will prompt to see if you would like to run the Overlay/Popup detection wizard, which verifies that your recognition text is working...this is particularly valuable for applications that overlay popup areas on screens, as swiping recognition text may not include the relatively small area covered by a popup:
10. After clicking yes you will see the first mismatch, which might not be a true mismatch; it might be a bit of a false hit, but what the wizard has found is a screen that is a match based on the recognition text swiped with the mouse, but which has different data field locations or new fields. Review and verify that this is actually the same screen, just with different data rows, and click Get next mismatch:
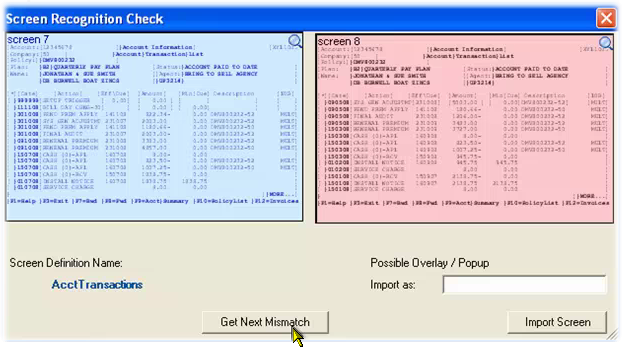
11. In the case of a valid mismatch which is usually a pop-up screen or a variant of a screen (same header, different footer area), enter a name and click on Import Screen and a new screen definition will be inserted above the screen originally matching the image. After importing, remember to to to the imported mismatch screens and set the recognition criteria to uniquely identify the screen.
12. When the Import Wizard is finished, the window will close and you can inspect your Project Explorer. Your screen names, location and recognition elements may now all be changed.
13. REMEMBER TO SAVE YOUR PROJECT!!!! As with most PC applications, a File-Save or Ctrl-S from the keyboard saves the active project...
Next section: Simple Field Mapping
