
Provided Help:
Studio Help: Tasks TreeView
Tutorial Section:
Note that before modeling your first Web Service, you need to ensure that all screens have been field-mapped that have keyVariable navigation fields or data you wish to read or write in the web service. If there are screens missing maps or other issues the generation phase will provide warnings that you can use to improve mappings before continuing.
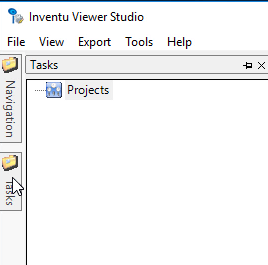
1.To work with Task Projects (both Web Service and Enhanced UI), the Tasks treeview panel needs to be visible and pinned. If it is not, click on the Tasks sidebar, then the Pin:
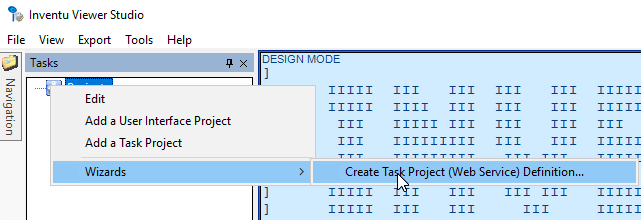
2.With the Projects node empty, create your first Web Service Project; Right-click on Projects and Select Wizards / Create Task Project:
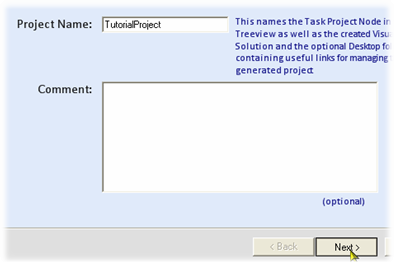
3.Enter a name for your project and click Next. If this is anything but a "throw-away" tutorial exercise, name the project as you would name the project through its full development life cycle; Viewer projects, even when started as a Proof-of-Concept generally are not discarded...
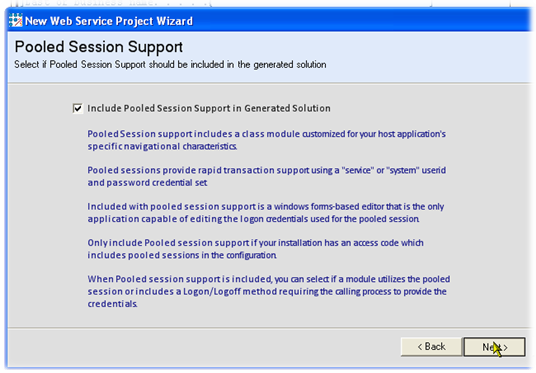
4.For each Task project, the option of Pooled sessions is available. Pooled sessions are very useful for providing rapid inquiries using a system userid and password. During this first, simple web service we will not utilize pooled sessions but click Yes to include support so that later examples can utilize this powerful feature:
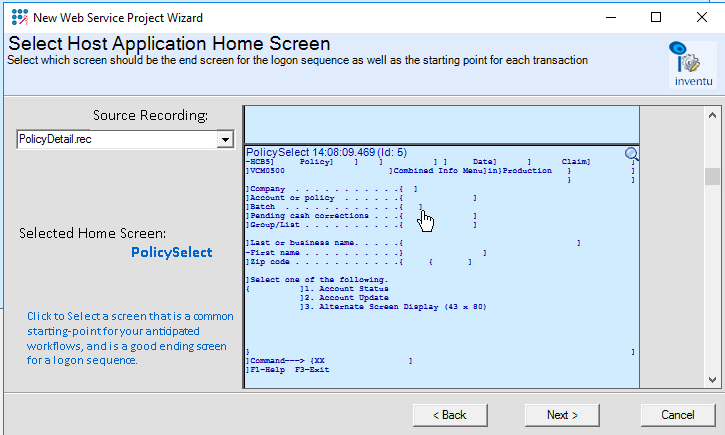
5.In the next step, the navigation "Home Screen" is selected by scrolling through a selected recording in your project. The Home screen is the "landing page" for initial logon and also should be a screen that any anticipated work-flows or transactions can be initiated from. In the case of the provided simulated insurance policy system, we will set the Policy Selection screen as the home screen:
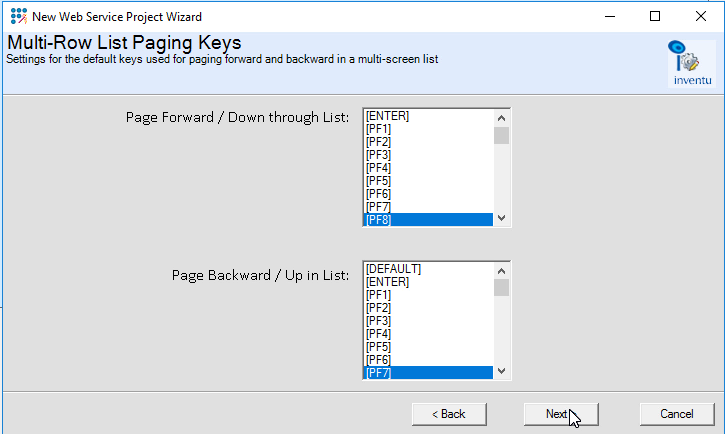
6.The next two wizard pages are for identifying common navigation keys. These are used during navigation when no recorded transition provides the necessary information, in which case the default navigation keys are used to move around until a home screen or other known screen (for the active navigation) is found. Check against your knowledge of any keying standards for your host application and select the appropriate keys. The defaults are based on the Common User Access (CUA) once authored jointly between IBM and Microsoft:
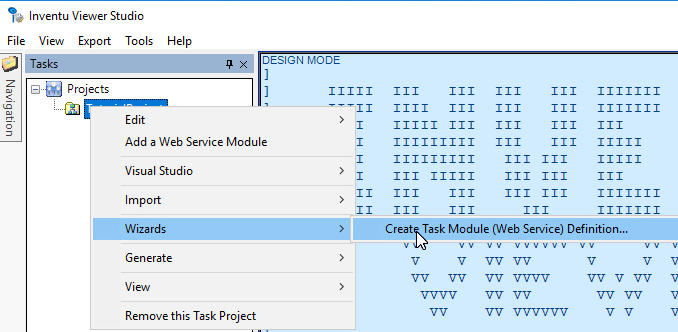
7.This will create a new Web Service TaskProject node in the Tasks treeview--to create the next definition, which is a Task Module, right click and select Wizards / Create Task Module:
8.
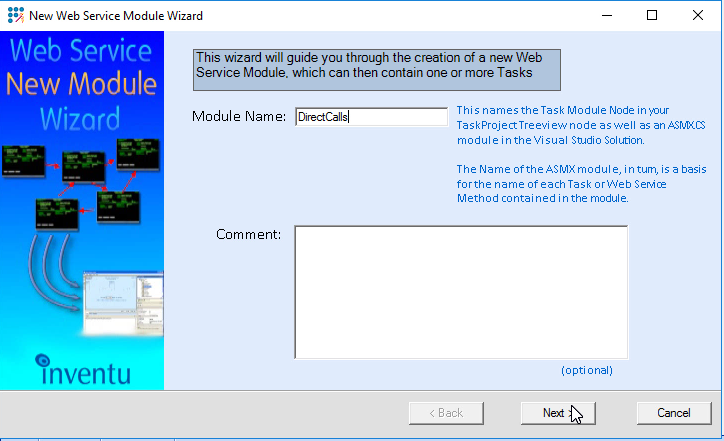
9.The Module definition wizard is very simple and starts with setting the name, I will name this one DirectCalls as it will not be using Pooled Sessions:
10.The next screen simply asks if this module will utilize pooled sessions. Pooled session support is set on a per-module basis and each TaskProject can contain multiple modules (each Viewer Task Module becomes an ASP.NET ASMX module). We do not check Pooled Session Support as this module will not use pooled sessions:

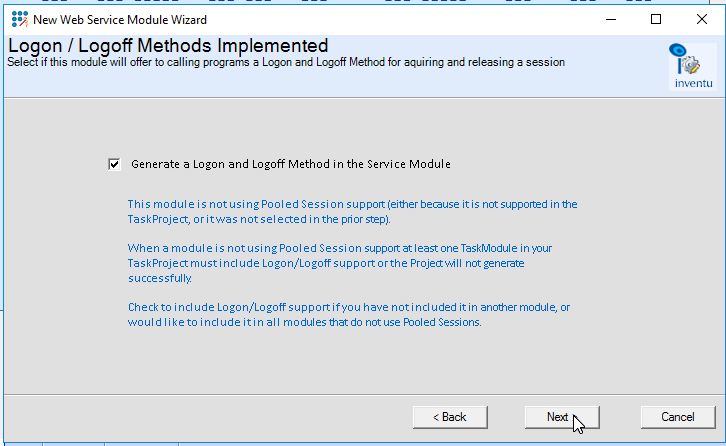
11.Since Pooled Sessions are not being utilized, the Wizard prompts for the option of generating Logon and Logoff methods in the module. At least one module in the project must have these if there are any non-pooled session modules, so check the option:
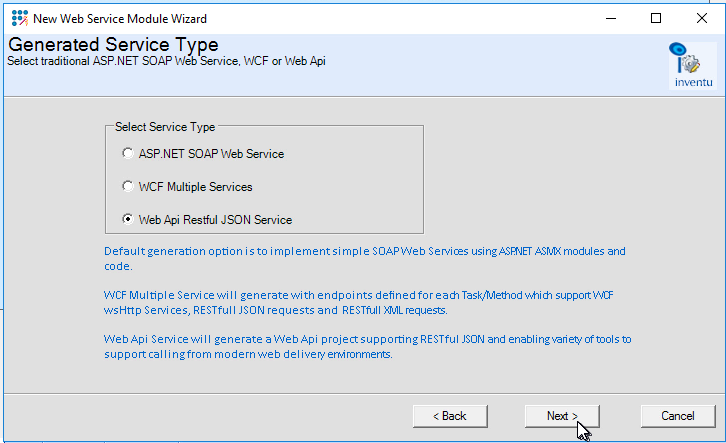
12.The next step is to select the type of services supported by this Module -- over time this has grown to three options starting with traditional SOAP Web Service, next was WCF Multiple Services (including the WCF SOAP Extended, Restful XML and Restful JSON and Introduced by Inventu in 2019, the Wep Api Restful JSON option, which is compatible with the Web API standard and includes the generation of SWAGGER files enabling integration with a wide variety of clients.
13. With the Web Api selected, an additional step provides the optional generation of a ScreenAPI module--this will create a GET and POST method for every screen that has screen maps defined. This enables a client to pick and choose screens to read and write. For our sample we will not generate ScreenAPI calls:

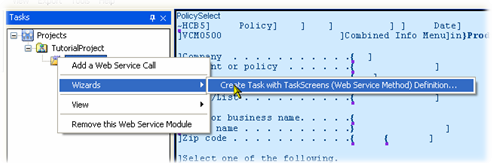
14.That completes the simple Module definition. Now the Task Project is ready to define one or more actual web services which is initiated by right-clicking on a Module and selecting Wizards / Create Task with TaskScreens:
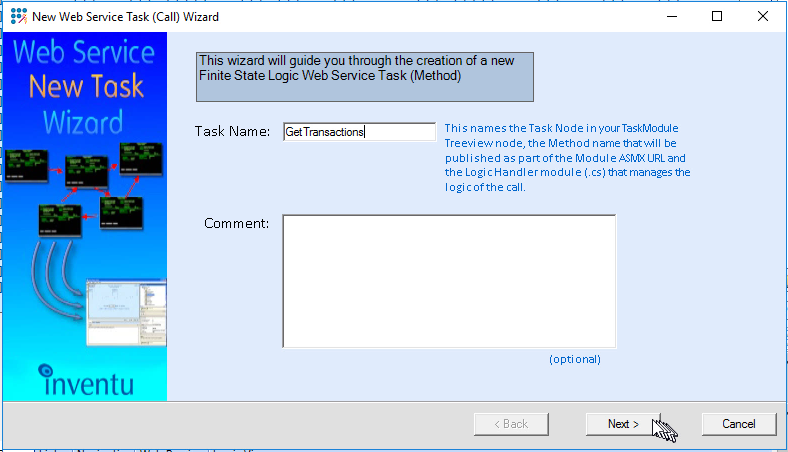
15.The Tasks wizard is the most comprehensive wizard of the three described in this Tutorial. This example will not show all of the panels that may be presented in the New Task Wizard but later tutorials will. First step; name the Task, which will be the name of the Web Method published in the Web API module:
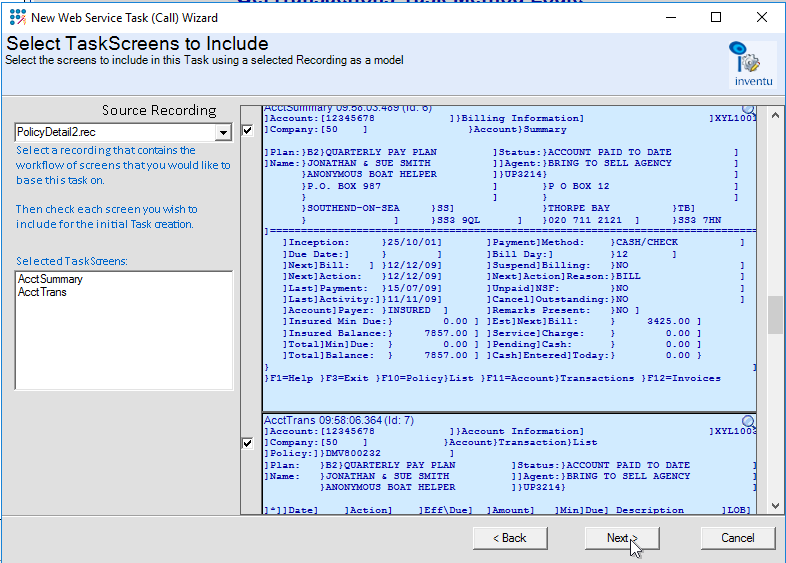
16.In the next step, the first thing is to select the best recording of those connected to your Project containing the workflow you are creating a web service method for. During the creation of this Tutorial update, we forgot to record accessing the Transactions screen, so did another recording named PolicyDetail2.rec...

Once the correct recording is selected, scroll down and check each screen you want to model for the web service. The kinds of screens you check always include any screen you wish to return data from. Optionally if a screen has particularly complex navigation, such as selection through a list of possibilities, you would check that also, so that the data entry can be properly handled.
In our simple case we will check the Account Summary screen and Transactions screen. Here is the Transactions screen being checked (note that Summary has already been checked):
17.When all screens in your transaction have been checked, click on the Next button to further define how the Web Service logic should handle each screen that was checked in this panel.
Here you can see the AccountSummary initial definition panel. In our simple web service, we are only performing an Inquiry on each screen. Inquiries are the simplest action and by selecting this, we will only have one Wizard Panel for each screen, as the Inquiry action requires no further definition:
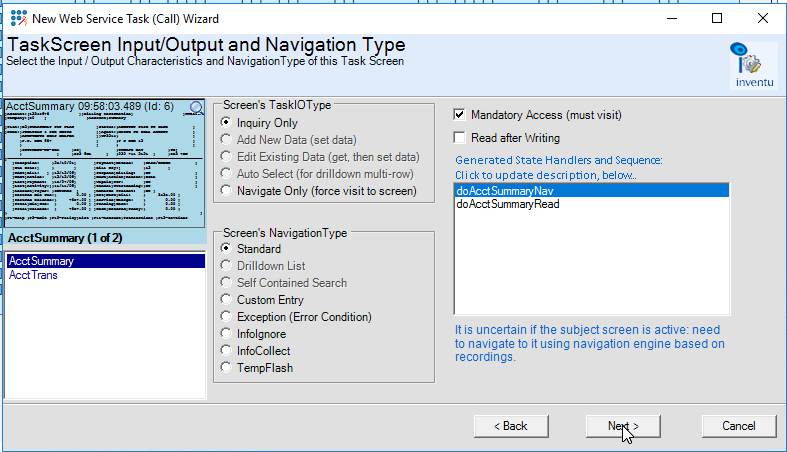
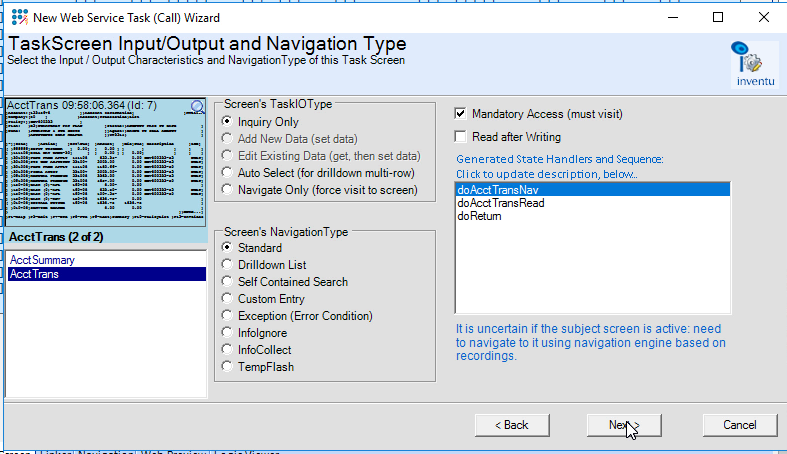
Note the "Generated State Handlers and Sequence" list box. State Handlers are an important concept to understand with Viewer Web services, as they are the logic foundation for processing each web service request. The more complex a screen's TaskIOType, the more State Handlers will be generated for the web service logic.
18.Next was clicked on the AcctTrans screen, so here is the AcctTrans wizard panel. Note that there are now three state handlers, as this is the last screen in the logic so a doReturn handler will be generated to perform the data return and cleanup:
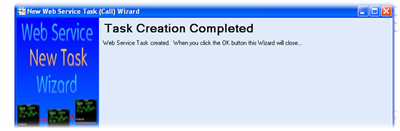
19.On clicking next on the final screen, the Task Creation Completed panel is displayed: Click Next to end the Wizard:
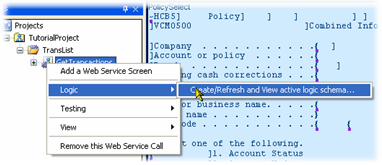
20.To view the Logic that will be generated for your new Task (Method), right-click and select Logic / Create/Refresh and View active Logic Schema:
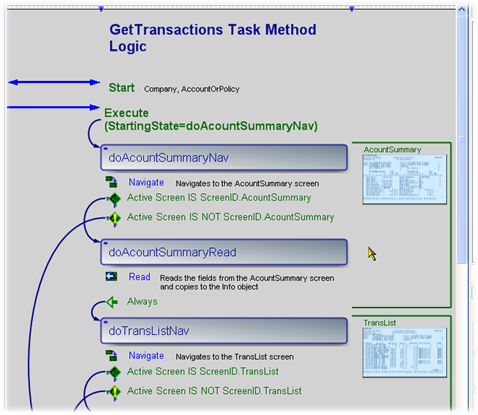
21.This displays the graphical logic schema showing how the logic for your web service will run, including all screen state handlers:
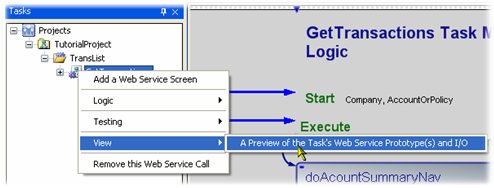
22.You can also check the Web Method published interface by right-clicking on the Task and selecting View / A Preview of the Task's Web Service Prototype(s) and I/O:
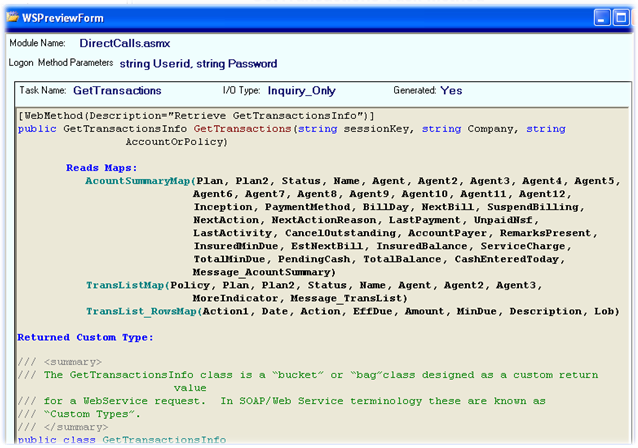
23.This displays how the web service method will be published:
24.This completes the Simple Web Service Task creation tutorial.
Next step: Generating the Web Service
